Low Slope Roofs Waterproofing System Installation (Two-Ply)
Two-Ply System
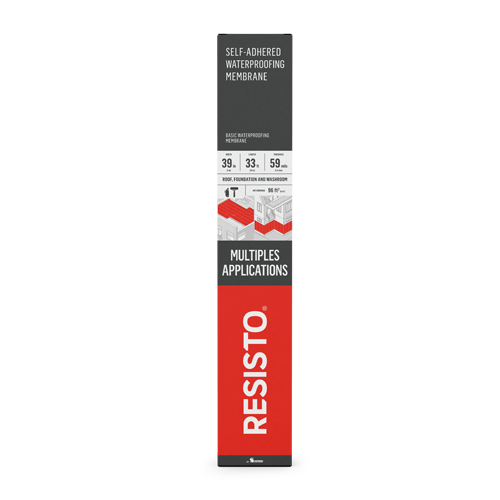
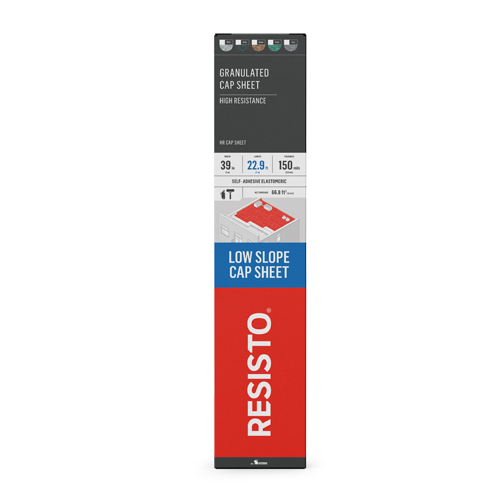
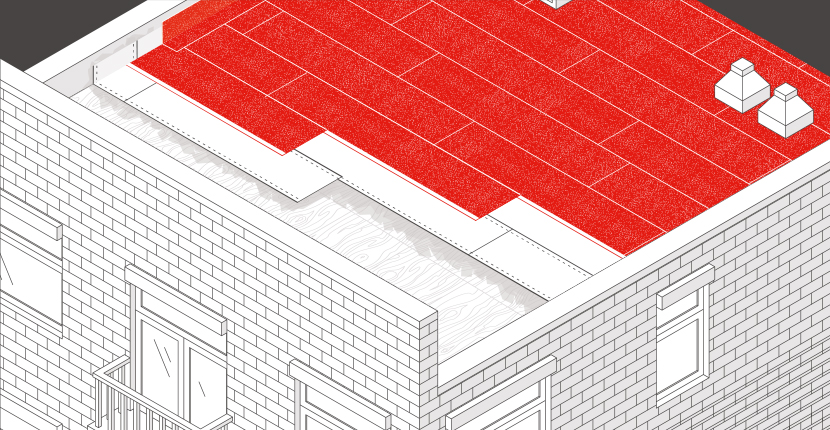
The use of the RESISTO SELF-ADHERED WATERPROOFING MEMBRANE as a first layer and the RESISTO GRANULATED CAP SHEET – HIGH RESISTANCE – HR CAP SHEET as a second layer is an ideal solution to ensure the waterproofing of low-slope roofs. These membranes are particularly effective for roofs with a very low slope between 1/8:12 (1%) and 4:12 (33%). For this type of roof, shingles and other traditional coatings are less durable and less aesthetic. This system can be used for a large number of projects, including home expansions, cabins, garages, annexes, carports, sheds, and workshops.
Warranty
The RESISTO two-ply roofing system is guaranteed for 20 years against any manufacturing defect in the products. This warranty applies to low-slope or near-flat residential roofs (up to 1/8:2 or 1% slope) that use the outer perimeter instead of a drain to evacuate water. See the warranty form available at renovation centres to learn more about the application conditions.
Tools Required
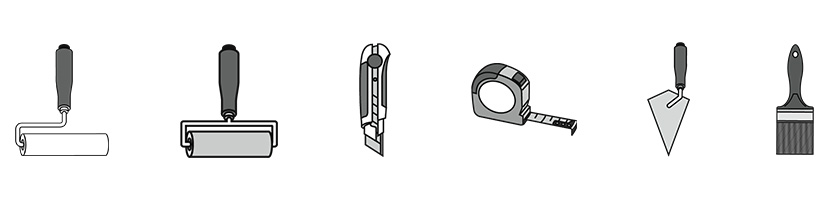
- Paint roller
- Membrane roller
- Utility knife
- Tape measure
- Trowel
- Brush
Application Conditions
The minimum installation temperature of the membranes is 50 °F (10 °C). The membranes must be applied on a clean, dry surface. It is important to condition the products at a temperature of at least 50 °F (10 °C) before installation.
Substrate
The substrate must be clean, sound and in good condition. Make sure there are no nails or screws protruding from the surface.
- Plywood
- Oriented strand board (OSB), rough side up
- Asphaltic panels (SEMI-RIGID ASPHALT BOARD)
Mix the primer well before the application.
Apply a coat of RESISTO PRIMER with a brush or roller on a clean, dry surface. The RESISTO H2O PRIMER is not compatible with SEMI-RIGID ASPHALT BOARD; therefore, we recommend using the RESISTO EXTERIOR PRIMER on this type of surface.
Allow 15 minutes to two hours for the primer to dry, depending on the ambient temperature and the amount applied. If the primer is wet, it can make the surface slippery; walk carefully on the roof.
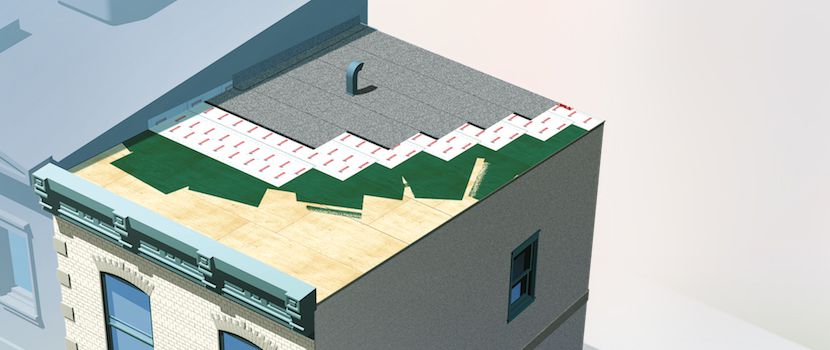
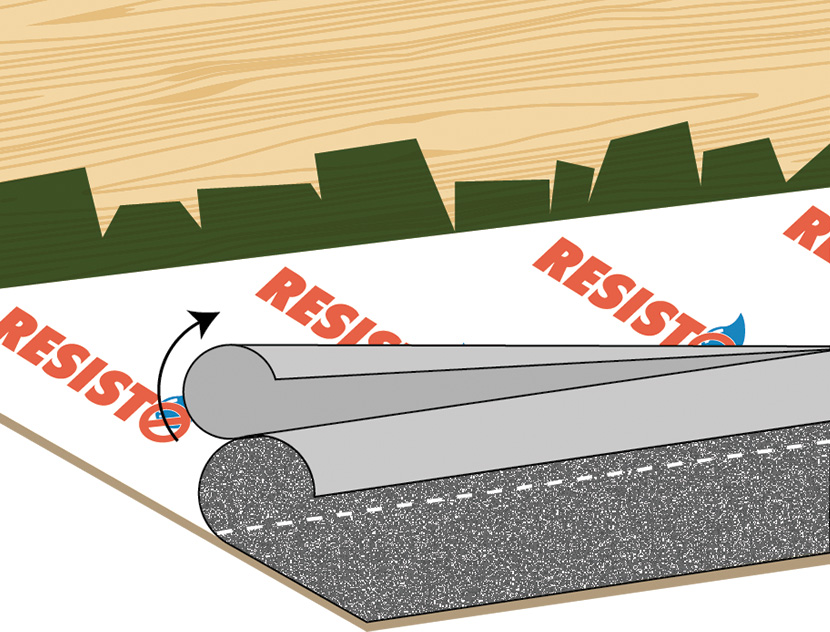
The first strip of the SELF-ADHERED WATERPROOFING MEMBRANE must have a width of 20 in (50 cm): joints of the first waterproofing layer must be offset from those of the second layer made with the GRANULATED CAP SHEET – HIGH RESISTANCE – HR CAP SHEET.
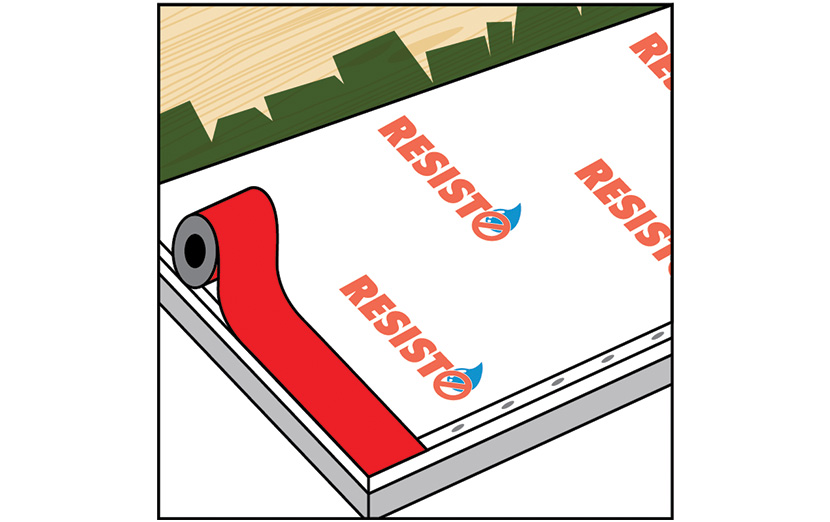
Position the membrane parallel to the edge of the roof, leaving an excess of about 3 in (8 cm) on the edge where the gutter will be installed. If the gutter is already in place, install the membrane starting from the roof edge.
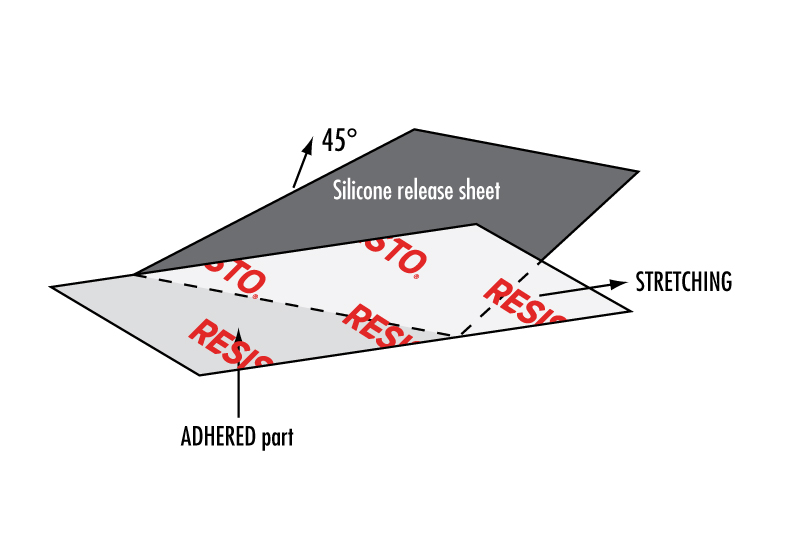
Unroll and position the roll.
While exerting tension at the other end of the membrane, gradually remove the protective film.
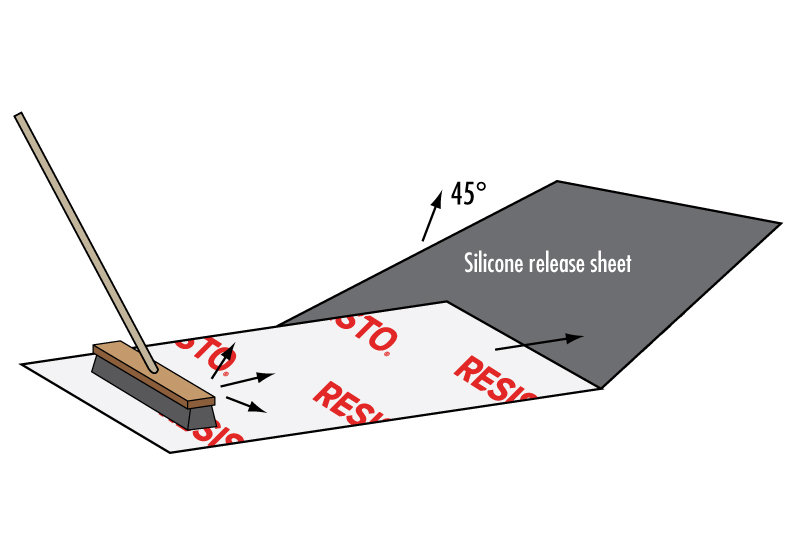
Apply pressure on the membrane using a metal or hard rubber roller to obtain complete adhesion between the substrate and the membrane. This step will also prevent swelling, creases and fish mouths.
Overlap the strips laterally by approximately 4 in (10 cm).
To butt joint two pieces of membrane, an overlap of 6 in (15 cm) is required.
After installing the membrane, fasten the metal flashing to the edge.
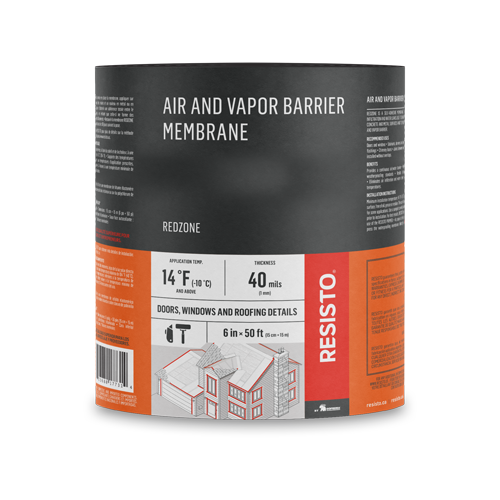
Install a strip of AIR AND VAPOR BARRIER MEMBRANE REDZONE of at least 4 in (10 cm) in width by overlapping it on the flashing and membrane already installed at the perimeter.
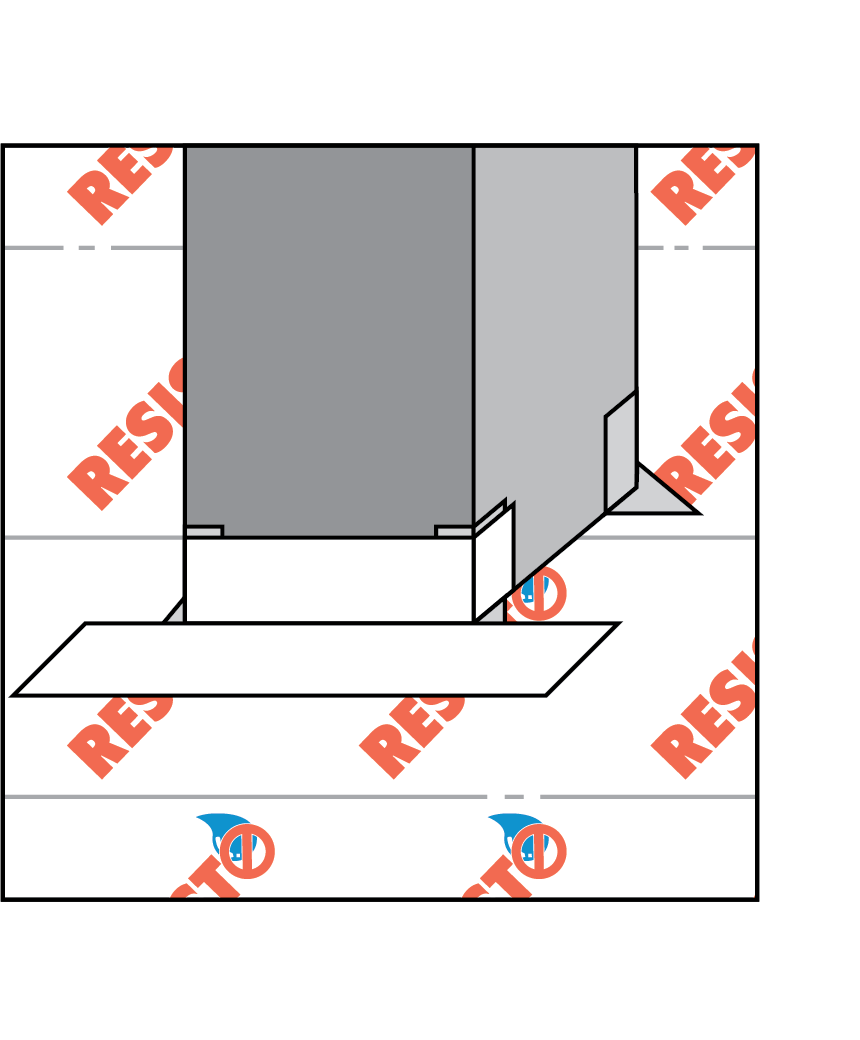
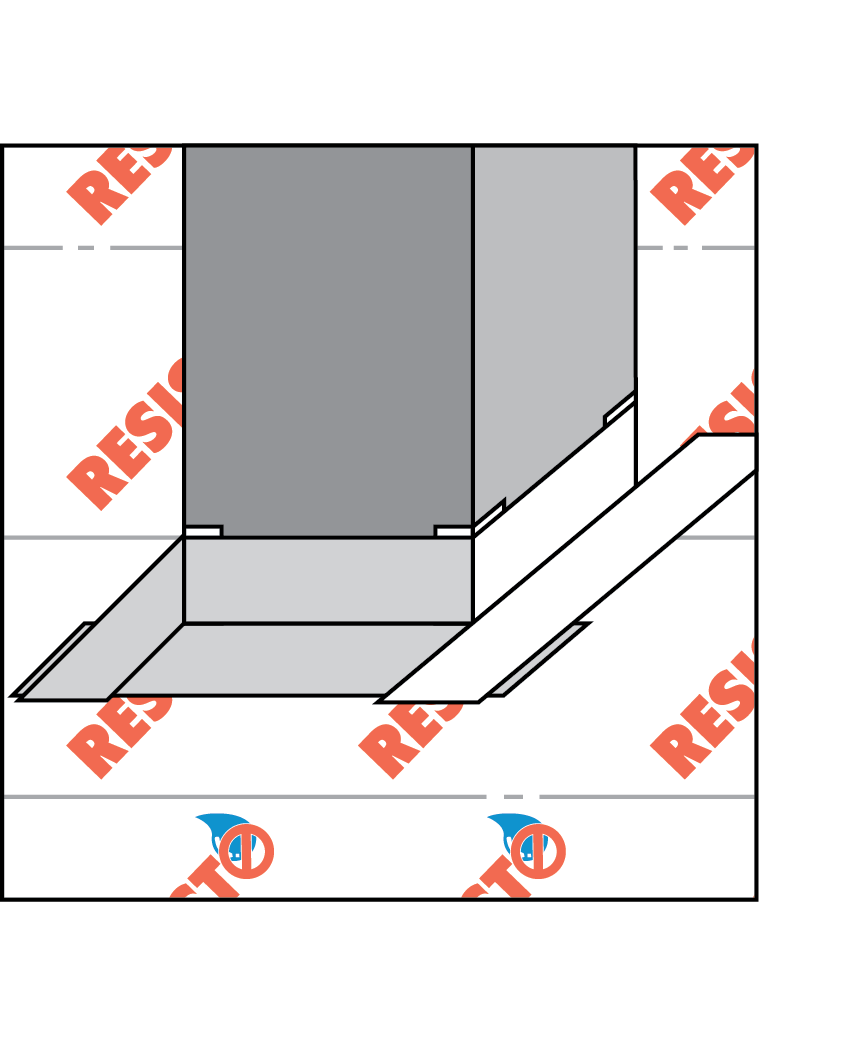
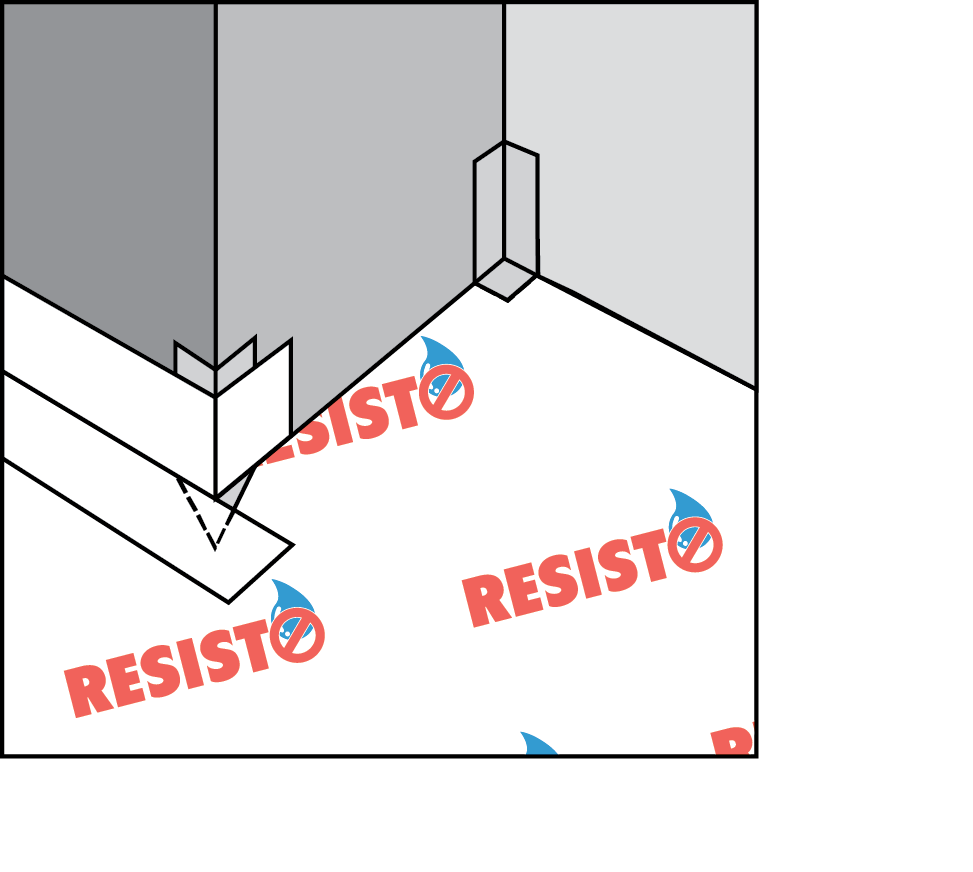
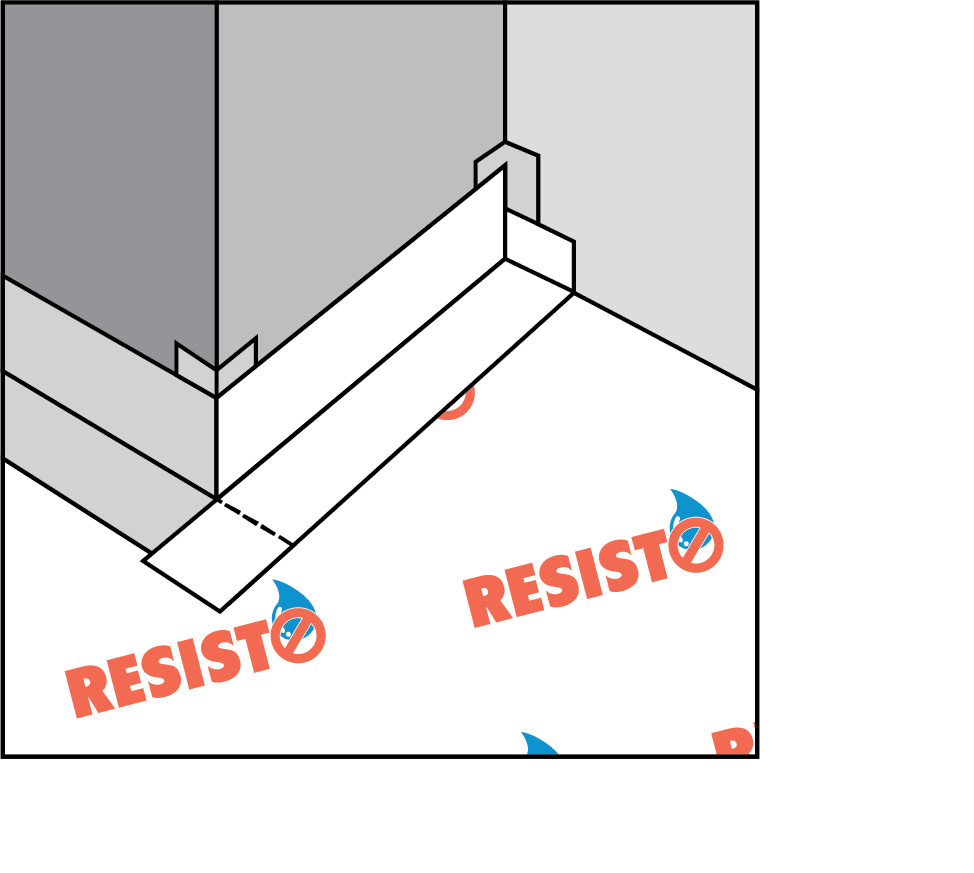
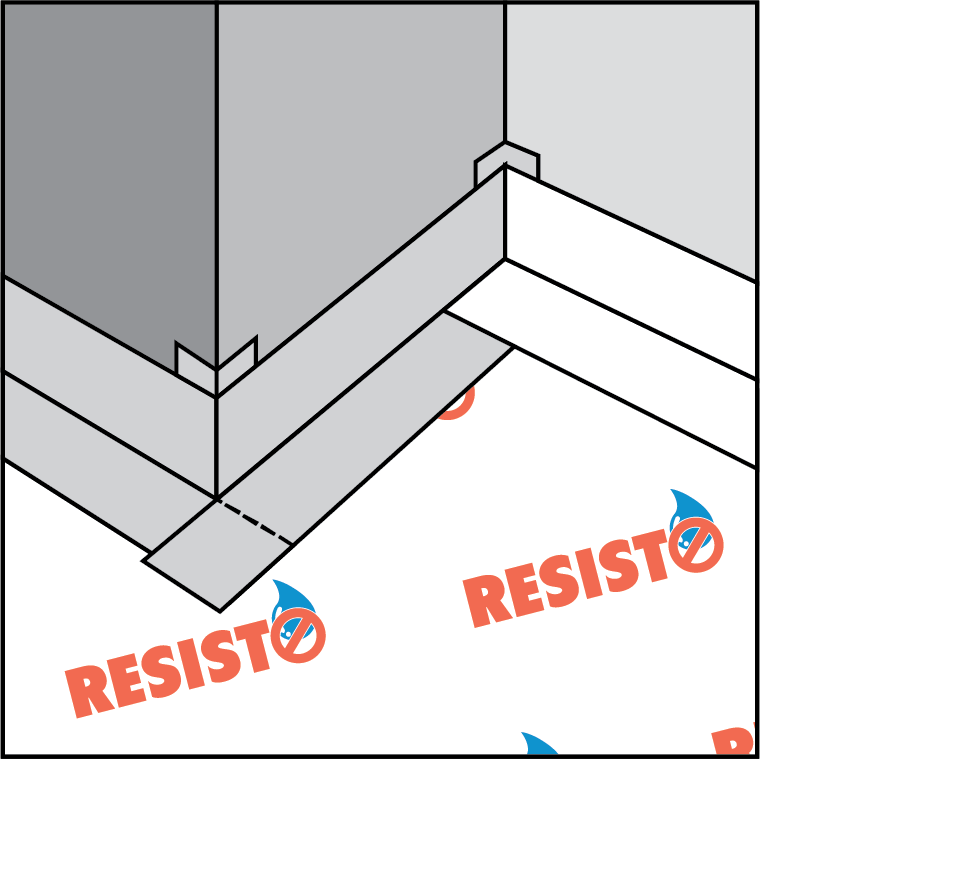
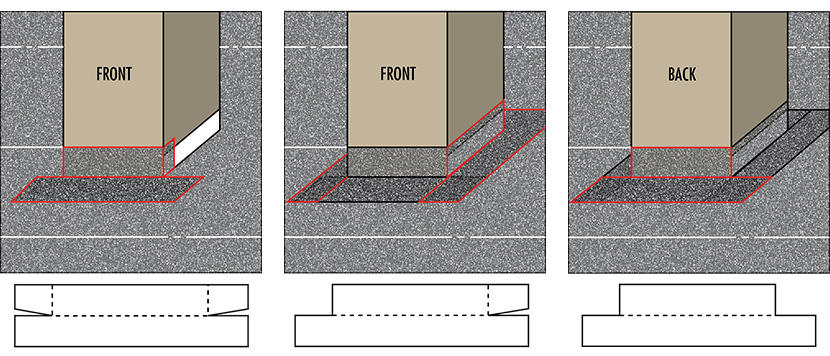
Use the RESISTO SELF-ADHERED WATERPROOFING MEMBRANE and follow these illustrations to seal the roof details.
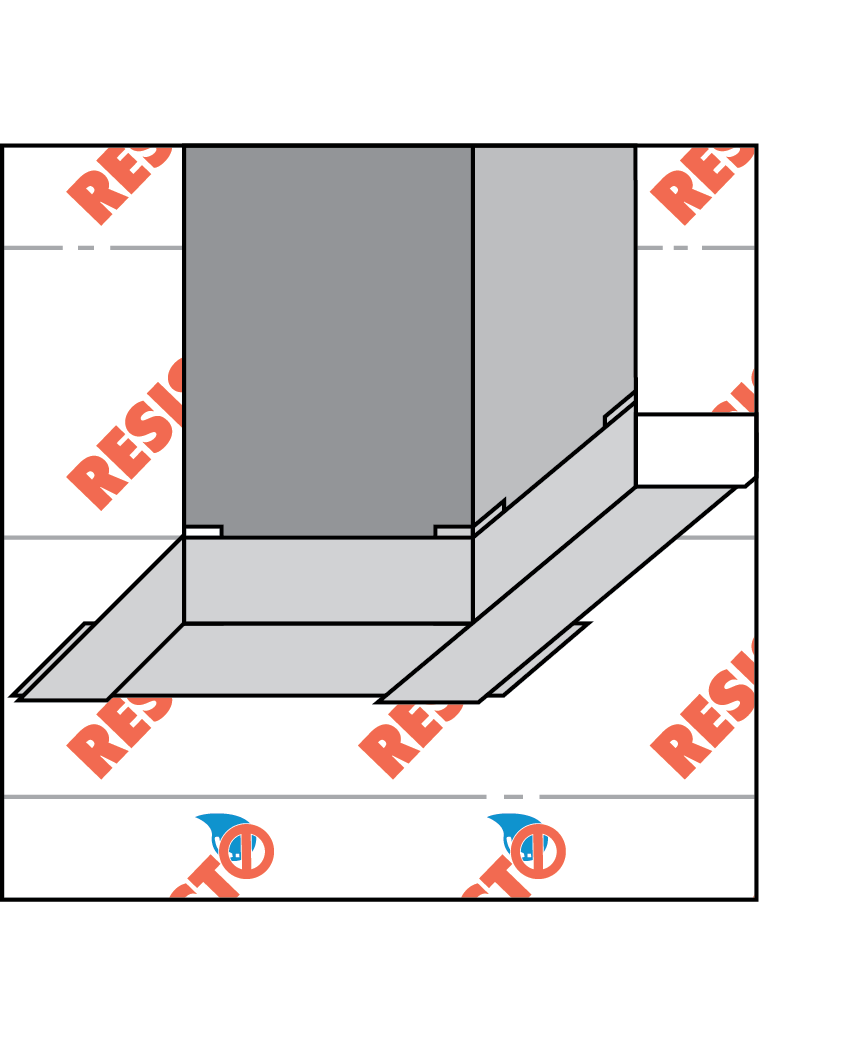
Install the membrane horizontally, starting at the bottom of the slope. Unroll and position the roll.
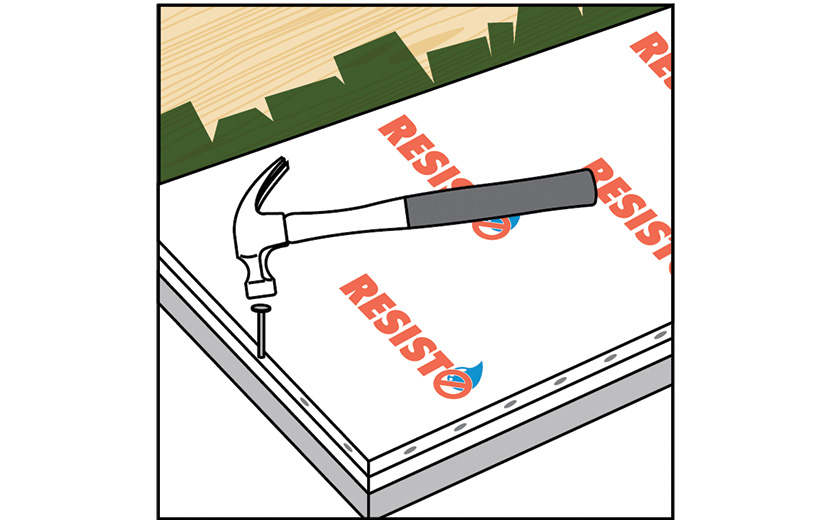
Self-adhesive cap sheet membranes could be affected by poor ventilation when they are installed directly onto a wooden deck with ventilated attic space. Since it is impossible to predict the temperatures to which membranes will be exposed in these conditions, it is recommended to mechanically fasten the membranes. This can be done using roofing nails or 25 mm (1 in) round top nails every 305 mm (12 in) at the end laps before covering them with the next membrane strip. When the slope is rather steep (3:12 [25%] and above), this step is strongly recommended.
Note: All nails must be covered with a membrane.
Remove the protective film from the GRANULATED CAP SHEET – HIGH RESISTANCE – HR CAP SHEET.
Immediately apply pressure on the membrane using a metal or hard rubber roller to obtain complete adhesion between the substrate and the membrane. This step will also prevent swelling, creases and fish mouths.
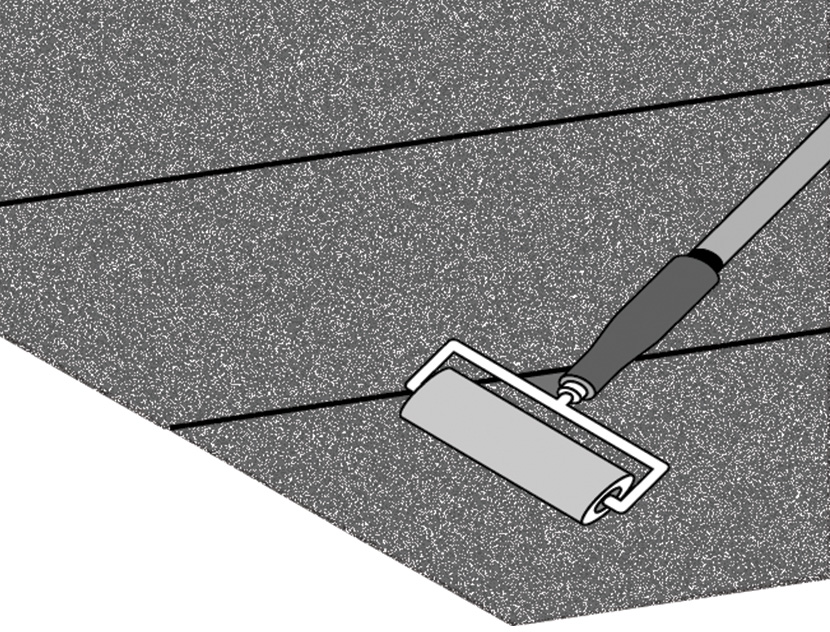
The ungranulated part of the membrane (approximately 4 in [10 cm]) should be used to ensure a good overlap between each strip; the ungranulated surface is provided for this purpose. The overlap must be positioned on the upper side of the slope.
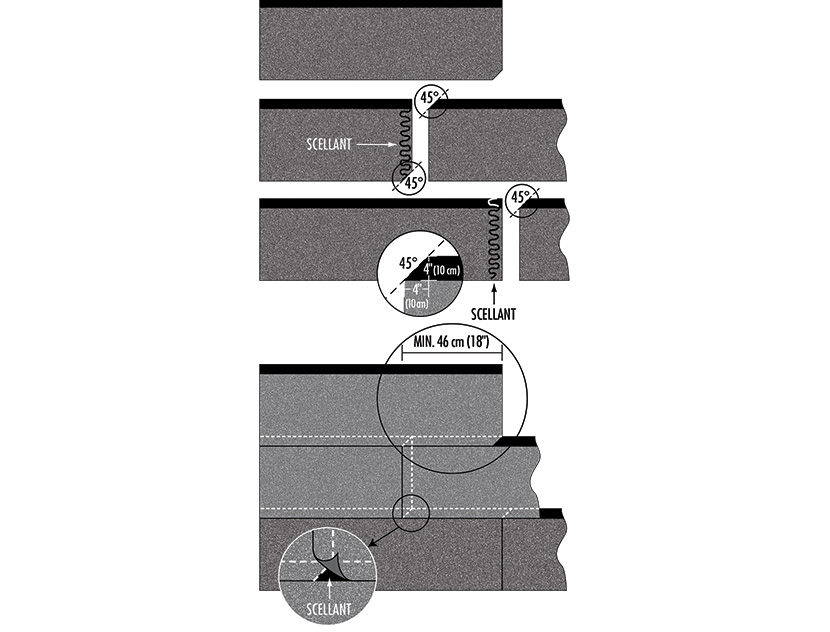
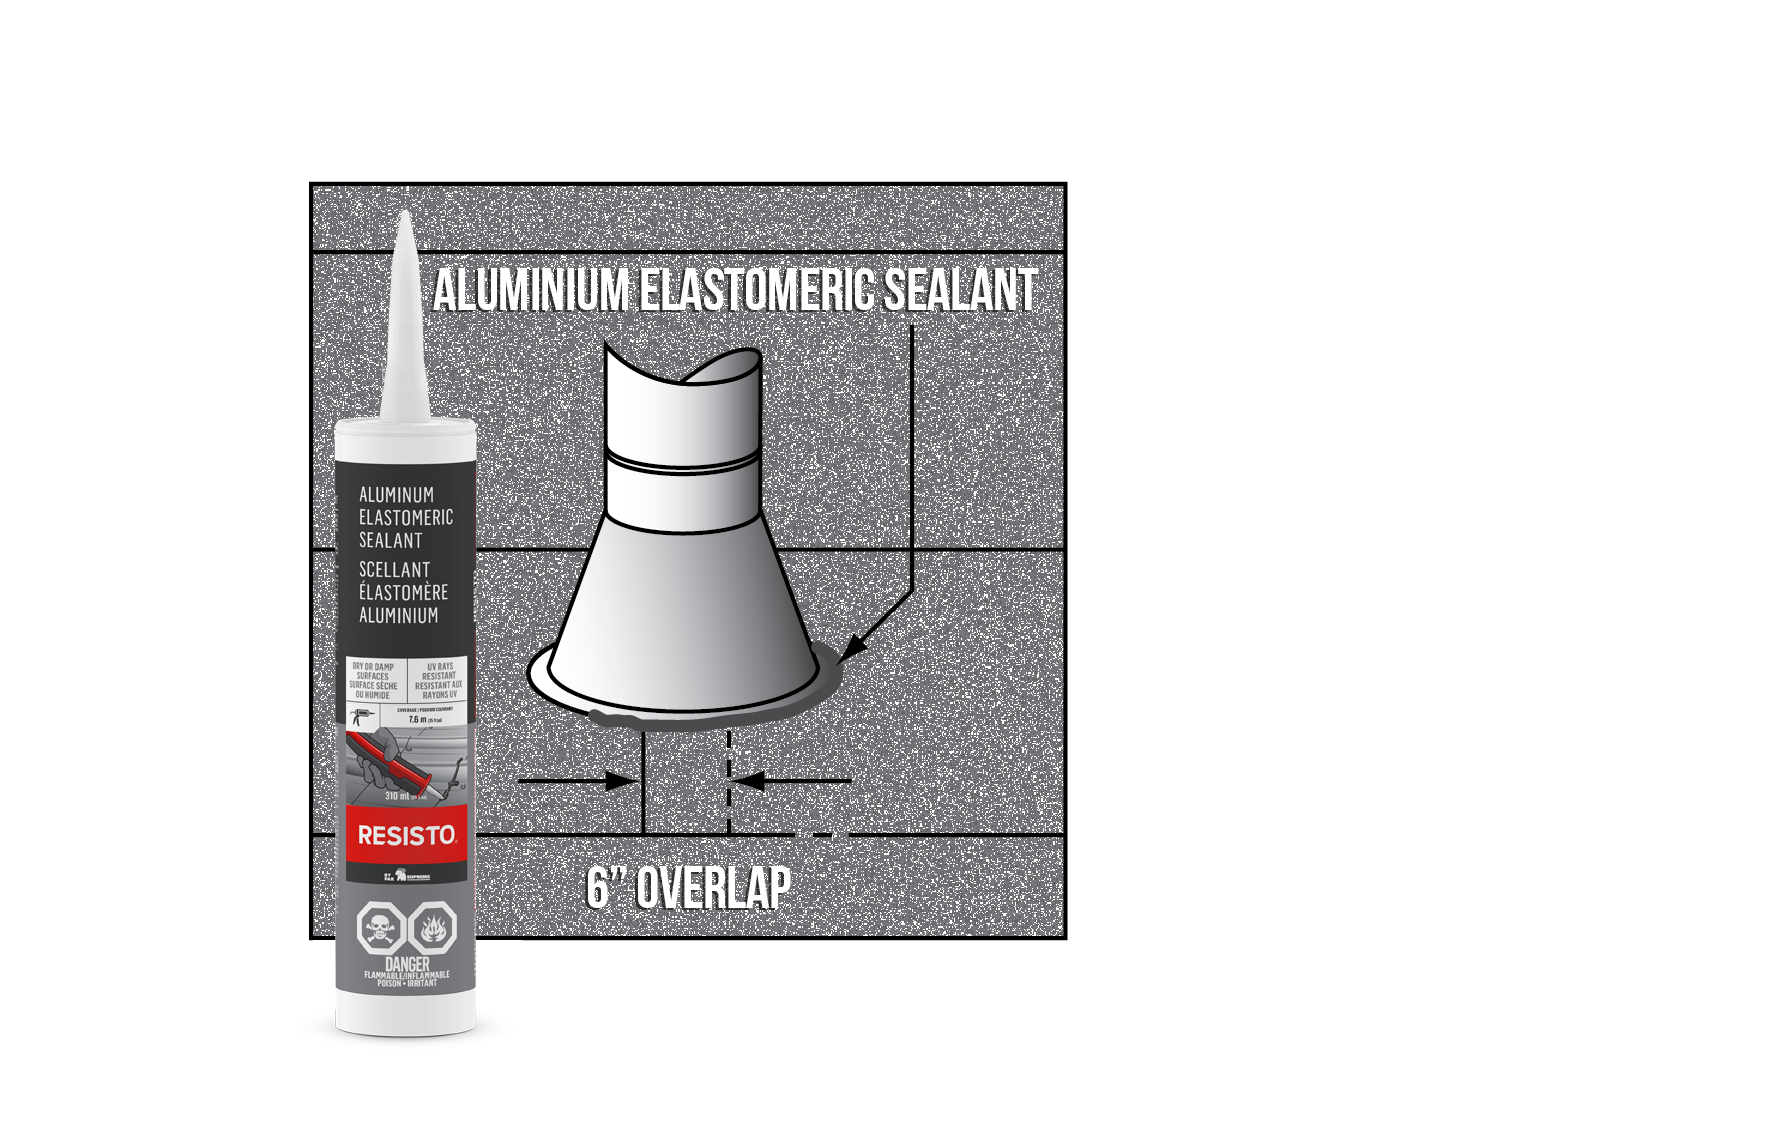
To butt joint two strips of GRANULATED CAP SHEET – HIGH RESISTANCE – HR CAP SHEET, allow a 6 in (15 cm) overlap by first applying the ELASTOMERIC SEALANT to cover the granulated part of the membrane to be overlapped.
Overlaps should be offset by least 18 in (46 cm).
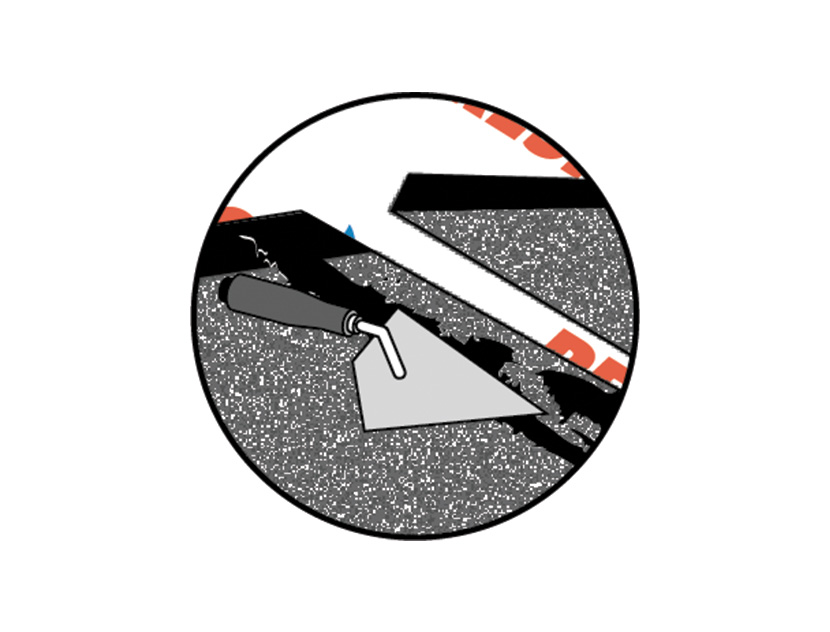
If a joint is formed of three layers of overlapping membranes, cut a 45° corner over a width of 4 in (10 cm) in the middle one.
LIQUID WATERPROOFING MEMBRANE ALSAN FLASHING is an excellent solution for roofing details.
See the details below.

This Installation Guide refers to the minimum installation steps required for the RESISTO product mentioned above. Please note that additional steps may be necessary depending on the substrate. However, this procedure is subject to change. RESISTO reserves the right to modify the documents and procedures at any time. Under no circumstances will RESISTO be liable for installation defects. For more information, please contact your representative, RESISTO’s technical support team, or your construction professional.
Document to download
Tick the checkbox to send PDFs as email attachments
-
Installation Guide Roofing Very Low SlopeInstallation Guide Roofing Very Low Slope pdf 2.4 MB
Complementary guides
-
3 ExpertLow Slope Roofs Finishing (Single-Ply)
-
3 ExpertRoof Details and Waterproofing